Showing posts with label blogger seo. Show all posts

Monday 25 March 2013

Blogger Adsense: 10 common places to put Ads in website or Blogger

// siddhu vydyabhushana // 1 comment
This article will discuss about the more common 10 places on our blog where we can place ads and about how to implement them and also which are the most suitable formats based on those available in our AdSense account.

Advertisements

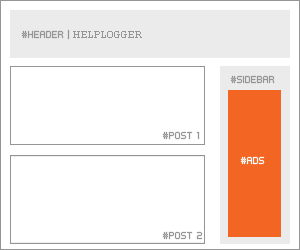
In the Sidebar

adsense, ads, add adsense blogger

How to implement.

This is one of the easiest places to place AdSense. Just go to the page elements (layout), click on the "Add a Gadget" link and add an HTML/Javascript widget with your ad code inside it or add directly an AdSense widget.

Recommended formats: 125 × 125, 120 × 600 and 160 × 600

Between posts
blogger posts, blogger tricks, adsense ads

Implementation. You can implement AdSense ads between your posts: go to Layout, click on the "Edit" link below the Blog Posts section, then check the "Show Ads Between Posts" option.

Recommended formats: 468 × 60, 300 × 250 and 336 × 280

Under the header
blogger header, blogger tips, adsense

Implementation:

Firstly, convert your AdSense ad code. You can use this converter here:
AdSense Ad Converter

Then, go to your Blogger Template (from your Dashboard, click on Template and press the Edit HTML button) and search for:
<div id='header-wrapper'>

Then paste the converted code right after it.

Recommended formats: 728 × 90 and 728 × 15

Above the blog posts

make money, adsense, blogger tutorials

Implementation:

Convert your ad code and search for <div id='main-wrapper'> in your template.

Paste the converted code right after it.

Recommended formats: 460 × 68, 468 × 15 and 336 × 280

Under the title of the post (this will be visible on all the pages)
money online, blogger tricks, how to blogger
 Implementation:

Convert your AdSense ad code and then go to your Template, Expand Widget Templates and look for:
<div class='post-header-line-1'/>

Note: if you can't find it, search it without the ending slash /

Paste the converted code right after it.

Recommended formats: 468 × 68 and 468 × 15

Under the post title (visible only on the posts pages)

Implementation:

Convert your ad code and then go to your Template, Expand Widget Templates and look for:
<div class='post-header-line-1'/>

Note: if you can't find it, search it without the trailing slash /

Paste the converted code, following this example:
<b:if cond='data:blog.pageType == "item"'>

<!-- Here your ad code -->

</b:if>

Recommended formats: 468x68 and 468x15

In the posts' footer 
post footer, adsense, blogger blogspot

Implementation:

Convert your ad code and then go to your Template, Expand Widget Templates and look for:
<p class='post-footer-line post-footer-line-3'/>

Note: if you can't find it, search it without the trailing slash /

Paste the converted code right after this line.

Recommended formats: 468x68 and 468x15

In the post's body (it will be visible on all pages)
adsense how to, blogger tricks, gadgets

Implementation:

Convert your ad code and then go to your Template, Expand Widget Templates and look for:
<div class='post-body entry-content'>

Note: in case you don't fint this code, search only for <div class='post-body'> 

And paste the converted code, following this example:
<div style='float:right'>

<!-- Here ad code -->

</div>

Recommended formats: 125x125, 180x150, 120x240 and 200x200

In the post's body (visible only in post pages)

Convert your ad code and then go to your Template, Expand Widget Templates and look for:
<div class='post-body entry-content'>

Note: in case you don't fint this code, search only for <div class='post-body'>  

And paste the converted code, following this example:
<b:if cond='data:blog.pageType == "item"'>
<div style='float:right'>

<!-- Here your ad code -->

</div>
</b:if>

Recommended formats: 125x125, 180x150, 120x240 and 200x200

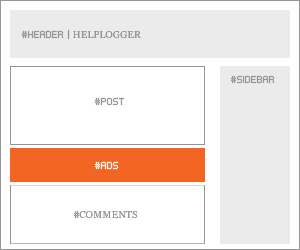
Between post and comments (visible only on posts pages)

Implementation:

Convert your ad code and then go to your Template, Expand Widget Templates and look for:
</b:includable>
<b:includable id='commentDeleteIcon' var='comment'>

Paste the converted code just above it, following this example:
<b:if cond='data:blog.pageType == "item"'>

<!-- Here comes your ad code -->

</b:if>

Recommended formats: 468x60, 300x250 and 336x280

In the blog's footer
blogger footer, adsense ads, make money online

Implementation:

Convert your ad code and then go to your Template, Expand Widget Templates and look for:
<div id='footer-wrapper'>

Paste the converted code right after it.

Recommended formats: 728x90 and 728x15

FAQ

I anticipated some questions likely to arise:

I can't find the codes, what should I do?
Always check the "Expand Widget Templates" checkbox. These are the default codes of Blogger and should be found in all the templates unless they have been changed by a hack or the template designer.

Why should I convert my AdSense code?
The Blogger's Template reads it as text and not as code and it is good to avoid any errors when trying to save it.

The ads are not displaying properly, why is that?
The ads could be affected by the styles (CSS) selectors (divs) containing them and some templates could be wrong designed, then you should consider modifying these styles, look for another relevant place or in extreme cases, change the template.

Can I put the all 10 codes on my blog?
No, you should choose just one of the places where you want to put the ads considering that AdSense have some limits on the number of ads that could be displayed. Try to make a balance with your content.

Why we there should be only 3 ads displayed on the main page?
Is due to the limit set by the AdSense. Combine the type of ads (text, rich media ads and link units) to be able to show the number of ads you want.

Hopefully, this will be useful to those of you wanting to display AdSense ads on your blog.
Read More

Saturday 23 March 2013

Blogger SEO:Where to Put Keywords inside a Blog Post for Better SEO

// siddhu vydyabhushana // 2 comments

                                                                  Where to Put Keywords inside a Blog Post forBetter SEO


keywords placement and optimization for better SEOAre you still confused in writing a better SEOoptimized post with targeted keywords, If yes then today I must clear this doubt. Bing Webmaster blog suggests the perfect keywordplacement area and optimization on a web page will have the the greatest impact in search engines. So please read this post carefully.

Where to put keywords in a blog post for Good SEO:

1. Page/Post Title

2. Body text headers such as H1, H2, H3 etc.

3. Hyperlinks (the link text between the <a> </a> tags)

4. Inside Meta Tags and Description

5. Article Starting i.e. at the first paragraph

6. Bold alphabets

7. Use keywords at Blog Post Permalinks

Last Advice :-

No one can ignore the importance of keywords in ranking high factor and by following these above tips and techniques, your post will definitely rank higher in SERP’s. Cheers!
Read More

Blogger SEO:Learn the Role and Use of Keywords in your Blog Posts

// siddhu vydyabhushana // Leave a Comment

What are SEO Keywords?

Basically SEO keywords are the keywords you use in your content that help make your article searchable via search engines for those keywords. When you use the  keywords more than one time in your article (keyword density) and when the the Google bot crawls your page, it determines how useful the page is for users and ranks the page in search engines accordingly.

What is Keyword Density?

In General, Keyword density is percentage of number of times Keyword appeared on a Web page by total number of words in that page. 

As per Math's, it is 
(No. of Keywords/ Total number of Keywords) * 100

What is the Ideal keyword density for an optimized page?

Well! According to most of the SEO Experts, it is around 5% that means for a 100 word article you must use keyword at least 5 times.

How to check your Keyword Density of a page?

Just Visit http://www.webconfs.com/keyword-density-checker.php and enter url to submit.

What is Keyword Stuffing?


keyword stuffing

Keyword Stuffing means using repeated and spam looking like keywords in your blog post again and again. Keyword stuffing is considered to be an unethical search engine optimization (SEO) technique. Keyword stuffing occurs when a web page is loaded with keywords in the meta tags or in content. The repetition of words in meta tags may explain why many search engines no longer use these tags.

Keyword stuffing had been used in the past to obtain maximum search engine ranking and visibility for particular phrases. This method is completely out-dated and adds no value to rankings today. In particular, Google no longer gives good rankings to pages employing this technique. For ex- You might have seen Incoming Search Results widget in some blogs or sites which is known as Keyword Stuffing technique.

Is Keyword Stuffing is good for my Blog Post?

Strongly No, Stuffing multiple SEO keywords in your post is a bad idea. You need to strike a balance between using keywords in your content and making the post reader friendly. Keyword stuffing will make your article look like spam and you will be penalized by Google which will ultimately show up in your ranking and many more.

How and Where to use Keywords in the article?


    • Use Keyword in Permalink

    • H1 tag

    • H2,H3,H4 Tags and Headlines

    • Meta title Tag

    • Start of the article

    • End of the article

    • Bold and Italics your Keyword and other important Semantic Keywords

                                    Learn the Role and Use of Keywords in your Blog Posts

Bonus tip: There is an obvious question: How to and where to find keywords from? The answer is quite simple and complicated as well. Do an insight research analysis on your content and find those keywords which any person who search might use it and make a list of it then. The more the words, the better are your chances. So you may take help from these popular tools online just below.

1. Google: Keyword Traffic Estimator Tool
2. Microsoft: AdCenter Keyword Forecast Tool
3. WordTracker: Keyword Suggestion Tool
Read More

Blogger SEO:Create and Submit Blog Sitemaps to Google and Bing

// siddhu vydyabhushana // Leave a Comment


Sitemaps are the way of telling all posts/pages inside your blog to the search engines to crawl. Its must to have an complete sitemap for a blog or site to get better rankings in SERP’s. Sitemaps are also known as Table of Contents. Its preferred to have an sitemap in .XML format. So today in this post I am going to tell you that How to create Sitemaps for bloggerblog and Wordpress blog as well. After creating, its time to submit it to popular search engines like Google, Bing and Ask etc to get quality traffic from that. Enjoy!


How to Create a Sitemap for WordPress Blog?

1. First of all Download and install Google XML Sitemaps- A WordPress SEO plugin!

2. Now activate this plugin from your Dashboard and go to settings.

3. Here your blog sitemap is ready (www.yourdomain.com/sitemap.xml) and now you can submit it to anywhere.

Extra tip: With the help of this plugin, You can able do some changes in your sitemap such as including/excluding categories,tags,pages,archives etc. Now you can also set your posts/pages frequency and priority style.

Alternate: You can also create sitemaps for your blog with this tool.

How to Create a Sitemap for Blogger Blog?

In Blogger, you don't need to create a sitemap. Your feeds will act like Sitemaps.

How to Submit your WordPress blog Sitemap to Google and Bing?

For Google:
  1. First Visit to Google Webmasters

  2. Now You will see list of all blogs that you created at blogger. Choose your main blog

  3. You are now on the Dashboard page where you can see reports related to crawl errors, search queries and sitemaps.

  4. Click the More » Link just under the sitemaps report.

  5. Towards top right side, click the ADD/TEST SITEMAP button

  6. In the empty blank paste your sitemap i.e www.yourdomain.com/sitemap.xml and then click "Submit Sitemap".

For Bing:

1. Log into Bing Webmaster Tools using your Hotmail account.

2. Once logged in you will see a dashboard with several options. Click the button " Add Site"  next to "Remove site button".

3. Now Submit your URL.

4. After submitting, fill some necessary information about for blog like Blog description, keywords, owner, company, mobile number etc. and click next.

5. Here comes the important part of verifying your blog either by placing meta tags, uploading a .html file in your root directory or updating DNS information etc.

6. Now Choose any 1 way of verifying your blog and get go.

7. After that, its time to submit your blog sitemap as www.yourdomain.com/sitemap.xmlas same as we have done in Google webmaster account.

8. Last part is to ping Bing servers now for that:

LINK#1 For Posts between 1-500

http://www.bing.com/webmaster/ping.aspx?siteMap=http%3A%2F%2Fwww.bloggingways.com%2Fatom.xml%3Fredirect%3Dfalse%26start-index%3D1%26max-results%3D500

LINK#2 For Posts between 500-1000

http://www.bing.com/webmaster/ping.aspx?siteMap=http%3A%2F%2Fwww.bloggingways.com%2Fatom.xml%3Fredirect%3Dfalse%26start-index%3D501%26max-results%3D500

Note- Don't forgot to replace www.bloggingways.com with your blog url and then open it in the browser. A message will get like "Thanks for submitting your sitemap". That's it!

How to submit your Blogger blog Sitemap to Google and Bing?

For Google:

Just follow the steps mentioned above in How to submit your WordPress blog to Google and Bing but note to add some additional urls/codes as blogger sitemaps as stated below.

Add these 2 Sitemaps in Google webmaster account:

1. http://YOURBLOGNAME.blogspot.com/feeds/posts/default?redirect=false

2. http://YOURBLOGNAME.blogspot.com/atom.xml?redirect=false&start-index=1&max-results=500

Note-For blogger blogs having posts more than 500 will add 3 sitemaps. 2 are given above and the last one is given below.

3. http://YOURBLOGNAME.blogspot.com/atom.xml?redirect=false&start-index=501&max-results=500

For Bing:

Add and Submit the above mentioned 3 sitemaps to Bing webmaster account and after that, ping web servers as per given below.

LINK#1 For Posts between 1-500

http://www.bing.com/webmaster/ping.aspx?siteMap=http%3A%2F%2Fwww.bloggingways.com%2Fatom.xml%3Fredirect%3Dfalse%26start-index%3D1%26max-results%3D500

LINK#2 For Posts between 500-1000

http://www.bing.com/webmaster/ping.aspx?siteMap=http%3A%2F%2Fwww.bloggingways.com%2Fatom.xml%3Fredirect%3Dfalse%26start-index%3D501%26max-results%3D500

Sitemap Submitter:

Now you can also use this popular tool to submit your blog sitemaps to multiple search engines at once.

That's it! Tutorial Completed! Now enjoy more traffic to your site with better crawlibility in search engines. Any doubts and queries are welcomed below.

Read More

Blogger SEO: How to Add Optimized + SEO Friendly Meta Tags in Blogger & WordPress

// siddhu vydyabhushana // Leave a Comment

Meta tags are also known as Special type HTML tags which provides you information about a particular Page or website. In general unlike normal HTML tags, meta tags do not affect how the page is displayed rather it contains the information about page, Title Tags, author, description of website, keywords, content, email, robots crawling and many more etc. Hence search engines use them in order to define a website or blog. Therefore to boost your site SEO  its must to Add these Meta tags quickly. Now today i came up with an important tutorial on How to add these meta tags inside Blogger and WordPress (optimized one) just below. So lets start with its importance first.

How to Add Optimized + SEO Friendly Meta Tags in Blogger & WordPress

Importance of Meta Tags in SEO

Well Meta tags are not that much important for website higher ranking but they helps to get more traffic form popular search engines like Google, Yahoo, Bing and Ask etc. Hence in simple words, adding Meta Tags will let the search engines to about your site/blog and also very helpful in indexing your pages more quickly and accurately in SERP’s. That means the meta tags communicates with the search engines to provide more extra information about your blog or website. That's it!

How to Add Optimized and SEO Friendly Meta tags in Blogger?

1. First of all login to Blogger Dashboard and then press Design- Edit Html tab properly.

2. Now search for <b:include data='blog' name='all-head-content'/> and just after that paste the below code mentioned.
<b:if cond='data:blog.url == data:blog.homepageUrl'>
<META NAME="Description" CONTENT="Blog Description" />
</b:if>
<META NAME="Title" CONTENT="Blog Title Here"/>
<META NAME="Keywords" CONTENT="Add Keywords Here" />
<META NAME="Author" CONTENT="Author Name Required" />
<META NAME="Robots" CONTENT="All" />

Keep Note- Don't forgot to replace the Blog Description, Blog Title Here, Add Keywords Here and Author Name Required with your own blog information above. Also I have enclosed the meta description inside a dynamic HTML tag in order to avoid duplicate content issue.

3. After doing that, click on the save button of Blogger HTML Editor and get go. Enjoy!

How to Add Optimized and SEO Friendly Meta tags in WordPress?

Its very simple to add Meta tags in WordPress, you don't have to do much load work as a plugin named as Add Meta Tags comes into play. This plugin optimize your WordPress blog for Search Engines by providing you an extra space for meta tags addition. All you have to install it inside your WordPress software. So lets first check its great features below…

1. Automatically addition of Meta Tags.

2. Meta tags for front page, Single post, Pages, Categories and Tags also.

3. Provide Extra SEO features such as

  • Add the NOODPoption to the robots meta tag.

  • Add the NOINDEX,FOLLOW options to the robots meta tag on category, tag, author or time based archives.

Installation Guide:

  1. First Extract the compressed (zip) package in the /wp-content/plugins/directory.

  2. Activate the plugin through the 'Plugins' menu in WordPress

  3. Visit the plugin's administration panel at Options->Metadata to read the detailed instructions about customizing the generated meta tags.
Read More

Blogger SEO:5 Effective Ways to Build Organic Backlinks

// siddhu vydyabhushana // Leave a Comment

Here are 5 Effective Ways to Built organic backlinks quickly. Apart from writing quality content and promoting it through social media, it’s necessary to have some quality backlinks to your blog. After the recent search algorithm changes by Google, many blogs are punished for several reasons. To stay safe and ahead of your competitors, it’s necessary to take some action and building organic backlinks will surely help.
This article is written after getting inspired from a video by Matt Cutts, the head of Google SPAM Team. He clearly mentioned some good points on how to build organic backlinks.

WHAT ARE ORGANIC BACKLINKS ?

There are thousands of ways to build links to your blog and none of them are equal to “Organic Backlinks”. In simple words, organic backlinks can be explained as the links that are naturally constructed, which usually happens when you focus on high quality and unique content.

HOW TO BUILT ORGANIC BACKLINKS ?

Here are 5+ sure fire tips that help to built organic backlinks to your blog.

1. CONTROVERSIES

Indulging in a Controversy will easily highlight things mostly if you are on the negative side. You need to follow-up regularly and have to be in touch with trending topics. Words have such a great power and believe me, with a single blog post you can grab the attention of the whole media. Play it safe or otherwise you may face some legal issues.

2. EXPERIMENTS

Experimenting on things will depend on your interest and passion to achieve something. Not everyone can do experiments as it needs lot of time and patience. So, if you are goot at something, then try to experiment on things and publish posts like How-to guides on your blog. This is how unique content can be built and organic backlinks will flow to your article, sometimes for years.

3. FREEBIES

Using a feebie to get subscribers and backlinks is an old yet powerful strategy. You cannot get backlinks immediately, but over time you can get some quality backlinks. This depends on the quality and type of freebie you are providing. If its a regular one, like a free PSD template or a free theme then there wont be much use. Try to work on creative things and give them away for free.

4. COMMUNITIES

Lets consider some blogs in the WordPress niche. There are quite popular and useful blogs on WordPress that help to make the most out of your WordPress blog. Whenever they write an article or list out some resources, links to the articles on other blogs will be included. This purely depends on the author of the article and so its necessary to establish some connections with fellow bloggers.

5. VIDEO BLOGGING

Many have the talent to create useful videos yet don’t try it. Consistent exposure can be gained through video blogging and if you need a sort of inspiration to start with, then you can check TheNewBoston (http://thenewboston.org/tutorials.php). That guy got good programming skills and he is sharing some knowledge through his videos. Make videos and your articles will be linked on many blogs.

BONUS TIP

Forum Participation also helps to get some backlinks. All you have to do is help others by providing some useful answers for questions in sections you have knowledge on. And important thing is don’t SPAM posts with single word answers, it may result in a ban.

OVER TO YOU

That’s it from my side and if I have missed any important one, let me know through comments. If you don’t agree with any of these methods or want some proofs on how they work, lets start the discussion now.

Read More

Blogger SEO:Download Google's Latest Cheat Sheet eBook To Optimize your site

// siddhu vydyabhushana // Leave a Comment
Whether you are a beginner looking to make a mark on the internet or just wanting to learn some stuff, or a pro who wants serious business online, Google is always there to help you. At the Google Webmaster Central blog, you will find any number of news, tutorials, tips, and best practices involved with webmastering. Google wants to help you out in making your content available to the world, and has released many items related to Search Engine Optimization, Google released an eBook some time ago which contained all the basic SEO tips you could think of in a nutshell. Well now, for starters, Google has released a new one-page quick-start eBook which captures the essence of SEO as it is used today.

Dubbed as a 'first steps cheat sheet' by Google, this eBook is specifically designed for people who have set up a blog or an online presence, but haven't given much thought to search. They might have made some content, but don't know the ABC of getting their website into Google Search.

This book is a very short and concise guide on search engine optimization, with tips on how to create SEO friendly design, This will help search engines like Google itself to better understand the content on your site, and hence will increase its visibility.

Take a look at this amazing one-page SEO eBook here.

How to download this eBook?

Here's the direct download link to this eBook;

DownloadGoogle One Page SEO Guide

If you're more of an advanced user, we something for you too! You can check out the more extensive Google SEO Starter Guide that will detail you through most of the basic SEO aspects.
Read More